3次元の面に対して画像を貼り付ける方法である.
例えばレンガの壁を作る場合に,本来であればすべてのレンガをモデリングする必要があるが,テクスチュアマッピングを用いることにより,より容易に現実的な画像を効率的に得ることを可能とする.
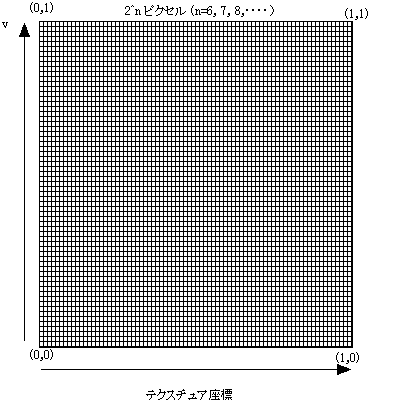
テクスチュアマッピングに用いる画像は以下のような座標系をもつ.
OpenGLの場合には,画像サイズは2^mピクセル×2^nピクセル(ただしm=6,7,8・・・,n=6,7,8・・・)である必要がある.
最大画像サイズは動作環境により異なる.
縦横が違うピクセル数をもつことも可能である.(例えば128×64等)
(テクスチュアのピクセルをテクセルと呼ぶ)
(準備)
tex1.bmpという名前で64ピクセル×64ピクセルの画像ファイルを作成すること.
プログラム>>アクセサリ>>ペイント 変形>>キャンバスの色とサイズ 64×64ピクセルにし,画像を作成
(コード)
'Texture1.frm
'Form1上にCommand1,Picture1,Picture2が必要
Option Explicit
Dim m_hGLRC&
Private Type axis
x As Single
y As Single
z As Single
End Type
Dim tex() As Byte 'テクスチュアマッピング用の配列
Dim rot As axis
Dim tr As axis
Private Sub Command1_Click()
Timer1.Enabled = Not Timer1.Enabled
End Sub
Private Sub Form_Load()
Timer1.Interval = 10
Timer1.Enabled = False
Command1.Caption = "回転"
End Sub
Private Sub Picture1_Paint()
SetView
SetLight
display
End Sub
Private Sub SetView()
glMatrixMode mmProjection
glLoadIdentity
glFrustum -2, 2, -2, 2, 2, 100 '透視投影変換設定(gluPerspectiveの代替)
glMatrixMode mmModelView
glViewport 0, 0, Picture1.Width, Picture1.Height
End Sub
Private Sub Form_Initialize()
Initialize
ReadTex
texdraw
End Sub
Private Function Initialize() As Boolean
Dim pfd As PIXELFORMATDESCRIPTOR
Dim R&
Picture1.ScaleMode = vbPixels
'set standard parameters
pfd.nSize = Len(pfd)
pfd.nVersion = 1
pfd.dwFlags = PFD_SUPPORT_OPENGL Or PFD_DRAW_TO_WINDOW
Or PFD_DOUBLEBUFFER Or PFD_TYPE_RGBA
pfd.iPixelType = PFD_TYPE_RGBA
pfd.cColorBits = 24
pfd.cDepthBits = 16
pfd.iLayerType = PFD_MAIN_PLANE
R = ChoosePixelFormat(Picture1.hDC, pfd)
If R = 0 Then
MsgBox "ChoosePixelFormat
failed"
Exit Function
End If
R = SetPixelFormat(Picture1.hDC, R, pfd)
'palette?
m_hGLRC = wglCreateContext(Picture1.hDC)
wglMakeCurrent Picture1.hDC, m_hGLRC
glDepthFunc GL_LEQUAL
glEnable GL_DEPTH_TEST
glShadeModel GL_FLAT
'Fog
Dim fogclr(4) As Single
fogclr(0) = 1: fogclr(1) = 1: fogclr(2) = 1: fogclr(3)
= 1
glFogfv GL_FOG_COLOR, fogclr(0)
glFogfv GL_FOG_DENSITY, 0.1
glDisable GL_FOG 'fogをONにする場合には glEnable
GL_FOG
Picture2.Visible = True 'ここをFalseにするとPicture2は表示されない.
Initialize = True
End Function
Private Sub Form_Unload(Cancel As Integer)
If m_hGLRC <> 0 Then
wglMakeCurrent 0, 0
wglDeleteContext m_hGLRC
End If
End Sub
'テクスチュア画像の読み込み
Private Sub ReadTex()
Dim i As Integer, j As Integer, w As Integer, h As Integer
Picture2.AutoRedraw = True
Picture2.AutoSize = True
Picture2.ScaleMode = vbPixels
'画像ファイルの読み込み
'(画像ファイルは自分の作成したファイル名)
Picture2.Picture = LoadPicture("tex1.bmp")
w = Picture2.ScaleWidth - 1
h = Picture2.ScaleHeight - 1
'画像サイズが分かったので配列を再定義
ReDim tex(2, w, h)
'配列に画像情報を入力する(上下反転に注意)
For j = 0 To h
For i = 0 To w
tex(0, i, h - j) = getR(Picture2.Point(i, j))
tex(1, i, h - j) = getG(Picture2.Point(i, j))
tex(2, i, h - j) = getB(Picture2.Point(i, j))
Next
Next
End Sub
Private Sub texdraw()
'テクスチュアの設定
glPixelStorei GL_UNPACK_ALIGNMENT, 1
glTexImage2D GL_TEXTURE_2D, 0, 3, Picture2.ScaleWidth,
Picture2.ScaleHeight, 0, GL_RGB, GL_UNSIGNED_BYTE, tex(0, 0, 0)
glTexParameterf GL_TEXTURE_2D, GL_TEXTURE_WRAP_S,
GL_CLAMP
glTexParameterf GL_TEXTURE_2D, GL_TEXTURE_WRAP_T,
GL_CLAMP
glTexParameterf GL_TEXTURE_2D, GL_TEXTURE_MAG_FILTER,
GL_NEAREST
glTexParameterf GL_TEXTURE_2D, GL_TEXTURE_MIN_FILTER,
GL_NEAREST
glTexEnvf GL_TEXTURE_ENV, GL_TEXTURE_ENV_MODE, GL_DECAL
End Sub
Private Sub SetLight()
'平行光源(固定)
Dim valueLight0(3) As Single
Dim positionLight0(3) As Single
'fillarray4fはユーザー定義
FillArray4f valueLight0(), 0.7!, 0.7!, 0.7!, 1!
FillArray4f positionLight0(), 0!, 1!, 1!, 0!
glLightfv GL_LIGHT0, GL_AMBIENT, valueLight0(0)
glLightfv GL_LIGHT0, GL_DIFFUSE, valueLight0(0)
glLightfv GL_LIGHT0, GL_SPECULAR, valueLight0(0)
glLightfv GL_LIGHT0, GL_POSITION, positionLight0(0)
glEnable GL_LIGHTING
glEnable GL_LIGHT0
End Sub
Private Sub display()
Dim MaterialDiffuse(3) As Single
Dim MaterialSpecular(3) As Single
glMatrixMode GL_MODELVIEW
glClear GL_COLOR_BUFFER_BIT Or GL_DEPTH_BUFFER_BIT
glClearColor 0, 0, 0, 0
glLoadIdentity
glTranslatef 0, 0, -5
'テクスチュアON
glEnable GL_TEXTURE_2D
glRotatef rot.y, 0, 1, 0
FillArray4f MaterialDiffuse(), 0.2, 0.2, 0.2, 1!
FillArray4f MaterialSpecular(), 0.25, 0.25, 0.3,
1!
glMaterialfv faceFront, mprAmbientAndDiffuse, MaterialDiffuse(0)
glMaterialfv faceFront, mprSpecular, MaterialSpecular(0)
glBegin GL_QUADS
'法線の設定
glNormal3f 0, 0, 1
'テクスチャア座標の設定:及び物体の作成
glTexCoord2f 0, 0: glVertex3f
-4, -4, 0
glTexCoord2f 1, 0: glVertex3f
4, -4, 0
glTexCoord2f 1, 1: glVertex3f
4, 4, 0
glTexCoord2f 0, 1: glVertex3f
-4, 4, 0
glEnd
'テクスチュアOFF
glDisable GL_TEXTURE_2D
'球を描く
glTranslatef 0, 0, 2
FillArray4f MaterialDiffuse(), 0.4, 0.4, 0.1, 1!
FillArray4f MaterialSpecular(), 0.3, 0.3, 0.1, 1!
glMaterialfv faceFront, mprAmbientAndDiffuse, MaterialDiffuse(0)
glMaterialfv faceFront, mprSpecular, MaterialSpecular(0)
glutSolidSphere 0.5, 20, 20
SwapBuffers Picture1.hDC
End Sub
Public Function getR(color As Long) 'Longの整数からR成分を抜き出す関数を設定
getR = color And &HFF&
End Function
Public Function getG(color As Long) 'Longの整数からG成分を抜き出す関数を設定
getG = (color And &HFF00&) / &H100&
End Function
Public Function getB(color As Long) 'Longの整数からB成分を抜き出す関数
getB = (color And &HFF0000) / &H10000
End Function
Private Sub Timer1_Timer()
rot.y = rot.y + 5
display
End Sub
Private Sub FillArray4f(a() As Single, f1 As Single, f2 As Single, f3
As Single, f4 As Single)
a(0) = f1: a(1) = f2: a(2) = f3: a(3) = f4
End Sub